
Looking carefully: spot the difference, mazes and puzzles
Spot the difference, shadow matching, mazes and picture puzzles all ask the same thing of a child: look closely, compare, and keep looking until you find the answer. Teachers call this visual discrimination. For a five-year-old it means noticing that two pictures are not quite the same, that one shape fits a shadow and another does not, or that one path is a dead end. These are quiet, satisfying activities, good for a calm moment in the day.
The hard part for the grown-up is helping without solving the puzzle for the child. This guide shows how to do that for each kind of puzzle. Each takes five to ten minutes, and the child can stop when they have had enough.
This is a general routine, not an assessment. If you are worried about how a child sees or notices things, talk to their teacher or doctor.
Before you start
- Choose a quiet time and a table with good light.
- Offer a pencil or crayon and, for the puzzles, a finger to point with. Pointing is not cheating.
- Plan to ask questions rather than give answers. "What do you see here?" teaches more than "Look, it is the cat."
Step 1: Match real things first
Before pictures, play with objects: find the matching sock from a pile, sort spoons from forks, find two leaves that look alike. Play "I spy" with colors and shapes. This teaches the idea of "same" and "different" in a way the child can hold.
Step 2: Match a picture to its shadow
In shadow matching, each picture has a dark shape that is its outline. The child draws a line from the picture to the shadow it fits. Teach a simple way to look: pick one picture, look at its outline (is it tall, round, does it have ears?), and then check each shadow against it. The first pair is often done as an example, to show how it works.
Step 3: Spot the difference
A spot the difference sheet shows two pictures made of the same things. In the lower one something has changed: a picture has a different color, a different picture has taken its place, or a picture is missing. Teach the child to look place by place: top left in the first picture, top left in the second, and so on, row by row. Start with three differences and add more later. Circling each one as it is found stops the child from finding the same one twice.
Step 4: Find the way through a maze
Start with the finger: trace the path from the start to the end before using a pencil. Then use a pencil, lightly, without lifting it. Tell the child to look ahead a little, because the best way to avoid a dead end is to see it coming. If they are stuck, try starting from the end. An easy maze has wide paths and few turns, and the harder ones have more of both. Drawing along the path is also good practice in controlling the pencil.
Step 5: Build a picture puzzle
In a cut-and-glue puzzle, the child cuts out the pieces and puts them in the frame to make the picture. A frame with a faint picture in it is the easiest, since each piece can be matched to the faded picture. When that feels easy, switch to a frame with only the squares. Suggest a strategy: first find the piece that has the head, or the piece with a corner. Number labels under each piece help a grown-up check the answer afterwards.
How to help without solving it
- Ask a question instead of pointing: "Where is the same spot in the other picture?"
- Narrow the search: cover half of the picture with a sheet of paper and look at the rest.
- Give time. Wait for longer than feels comfortable before you say anything.
- Praise looking carefully, not speed.
- If the child is truly stuck, point to the area, not the answer: "Look in this corner."
When it goes wrong
- Gives up fast. Go back to an easier puzzle: fewer differences, an easier maze, fewer pieces. Success builds patience.
- Circles things without looking. Ask the child to tell you what is different before they circle it.
- Cuts off the picture in a puzzle. Make the cutting lines clear and practice cutting separately (see the guide on pre-writing and cutting).
- Races through. Ask for a different kind of challenge: finding all the differences with a finger, then with a pencil.
- Loses interest. Stop and come back another day. These puzzles should feel like play.
Practice without a worksheet
- Play "I spy" with colors, shapes and sizes.
- Find hidden objects in a picture book.
- Do a jigsaw puzzle together, starting with large pieces.
- Match socks, mittens or shoes into pairs.
- Put four toys on a tray, cover them, take one away and ask which one is gone.
When to move on
The child is ready for harder puzzles when they can:
- match pictures to shadows without help;
- find three differences in two pictures and circle them;
- finish an easy maze without lifting the pencil;
- put a four-piece puzzle together, then a six-piece one.
Free worksheets for each step
Each tool makes a new sheet whenever you press New sheet. Every sheet has an answer key for the grown-up and prints in color or black and white.
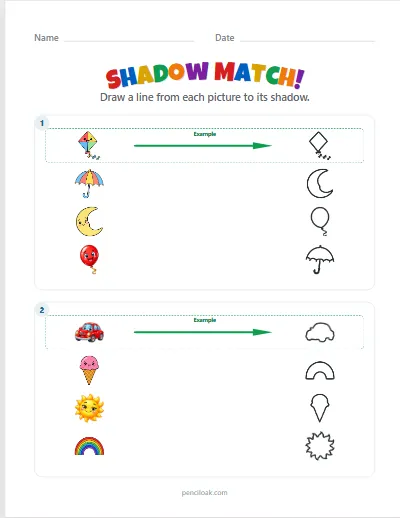
Step 2. Draw a line from each picture to its shadow. The first pair is done as an example.
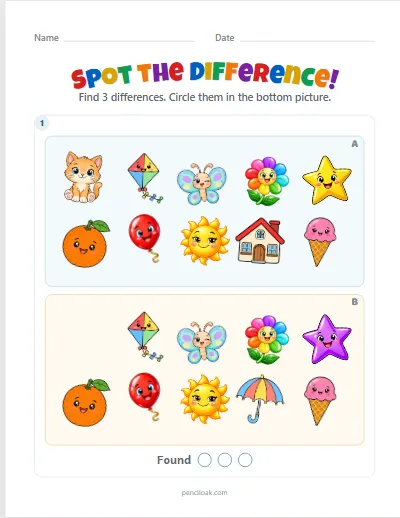
Step 3. Find the 3, 4 or 5 differences and circle them in the bottom picture.
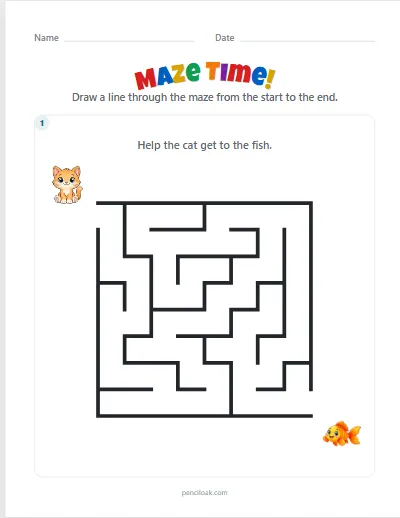
Step 4. Draw a path through the maze from the start to the end. Easy, medium or hard.
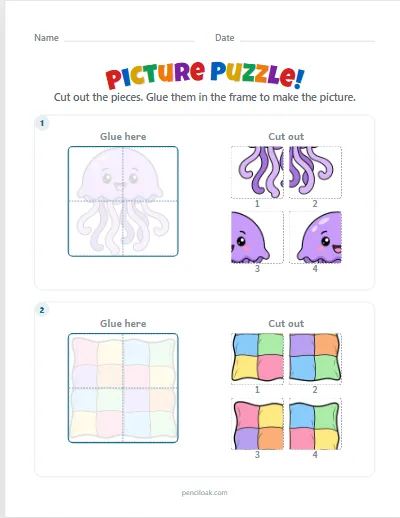
Step 5. Cut out the pieces and glue them in the frame. 4 or 6 pieces.
For more thinking games, see the guide on patterns, sorting and logic puzzles, or browse all worksheets.
Read next
- Pre-writing and cutting: fine motor skillsFrom playdough and tongs to lines, shapes, pencil grip and scissors — what to practice first, and what to do when a small hand tires.
- How to teach sight wordsThree to five words at a time: look, say, trace, find the word in print and read it in a sentence — and what to do when a child guesses from the first letter.
- Patterns, sorting and logic puzzlesSort, find the odd one out, continue a pattern, color the other half and solve a first sudoku — and why "how do you know?" matters most.